
RHCSA Networking Lab Objectives #
- Set hostname for your server to
rhscsa.example.com - Set your server to a fixed IP address that matches your current network configuration
- Set a second IP address
10.0.0.10/24 - Enable host name resolution for your local server hostname
- Reboot and verify network is still working with new settings
Preliminary Information Gathering #
Before we begin, let’s first gather some information.
⚠ Note: The addresses and subnets used in this procedure may not match the ones on your system. Use what is on your system.
With respect to the initial network settings, you’ll want to create a backup in case anything goes wrong.
We can easily do that by redirecting standard output to some backup files.
mkdir netbackup
ip address > ~/netbackup/ipaddr.bak
ip route > ~/netbackup/iproute.bak
cat /etc/resolv.conf > ~/netbackup/resolv.bak
You can also use nmcli device show to get ip and gateway in one shot.
Now that we’ve got that out of the way, let’s get to work.
1. Set hostname for your server to rhscsa.example.com #
If you want to do this via the command line run
hostnamectl hostname rhcsa.example.com
However, you can and probably should perform this task via nmtui
2. Set your server to a fixed IP address that matches your current network configuration #
First, we will run
ip address
📝 Note the first address and subnet mask on the line beginning with inet
inet 10.0.2.15/24
Next, we will run ip route in order to grab our default gateway.
ip route
It should say something like default via 10.0.2.2
Finally, we will grab our current DNS address by running
cat /etc/resolv.conf
You should see a line like nameserver 10.0.2.3
Be sure to note this address somewhere because we will use it in a moment.
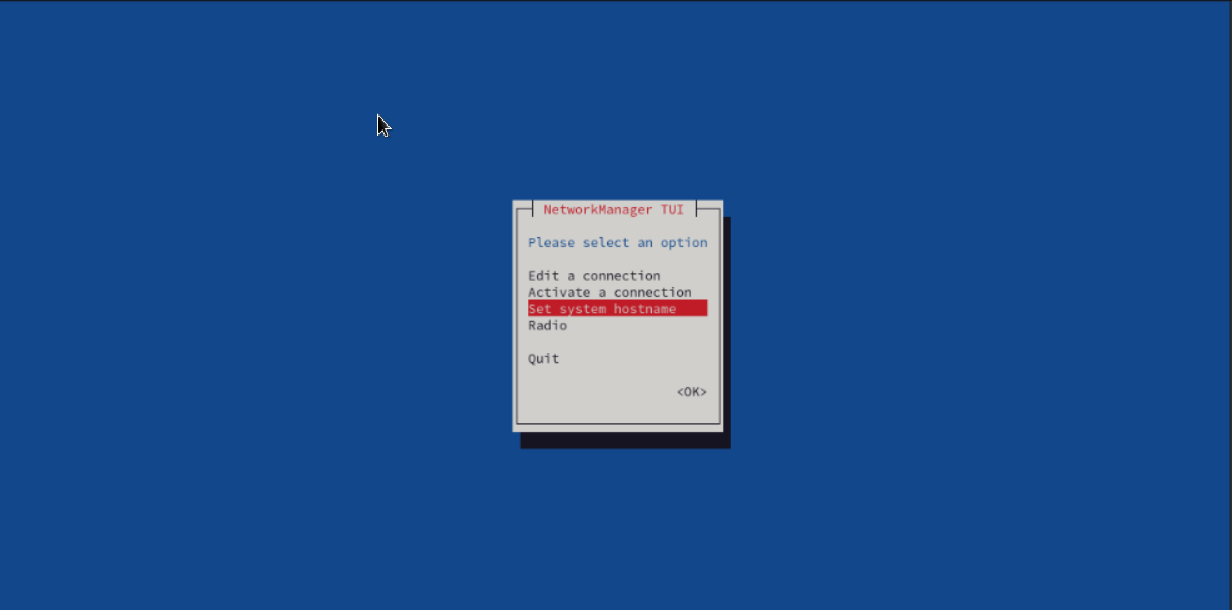
nmtui
Using nmtui is where the real fun begins because it makes managing your network settings an absolute breeze.
nmtui
nmtui stands for Network Manager Text User Interface. It is a command-line utility in Linux used to manage network connections through a text-based interface.
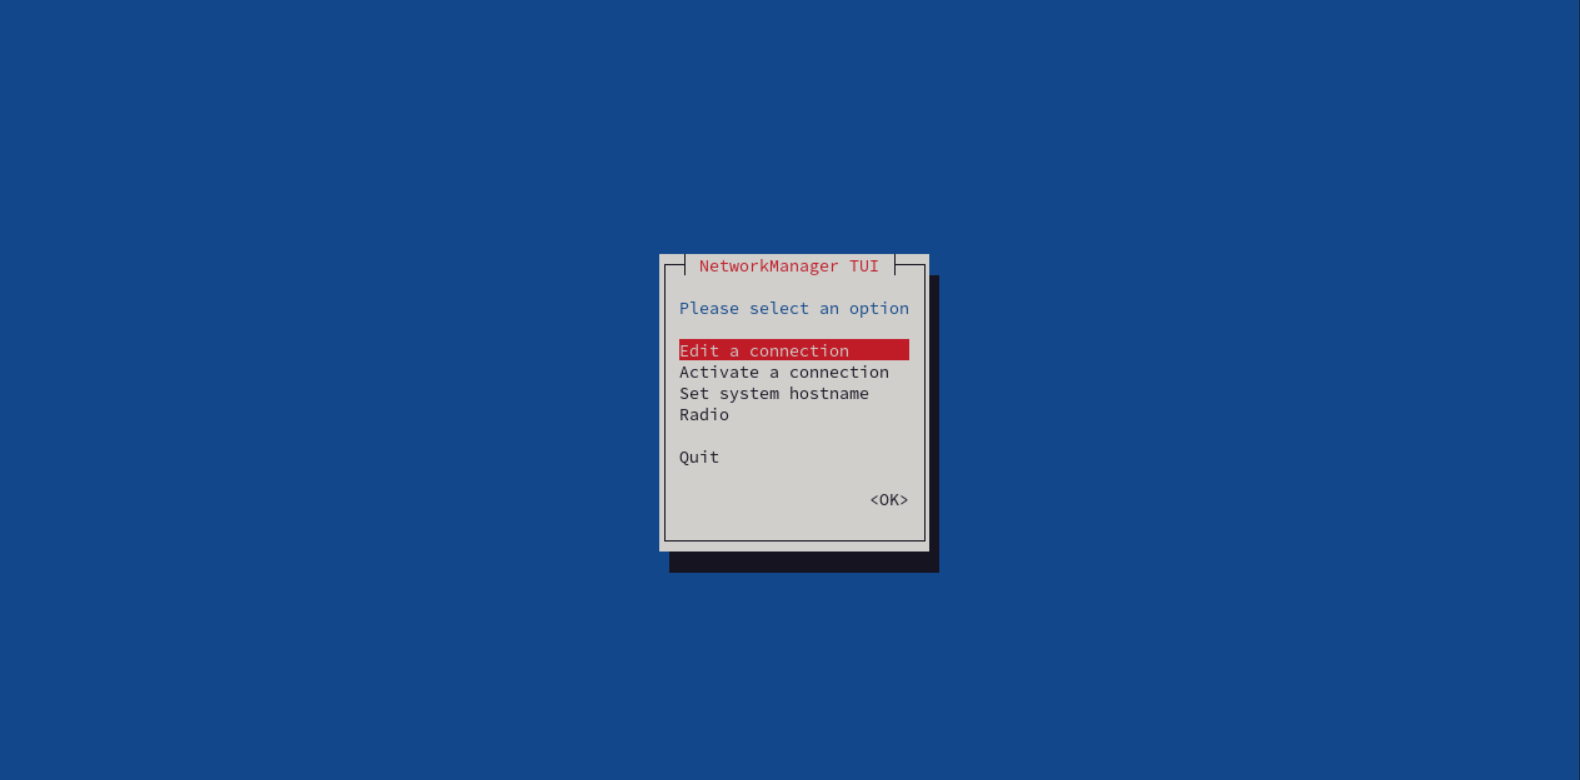
We’ll start by selecting Edit a connection.
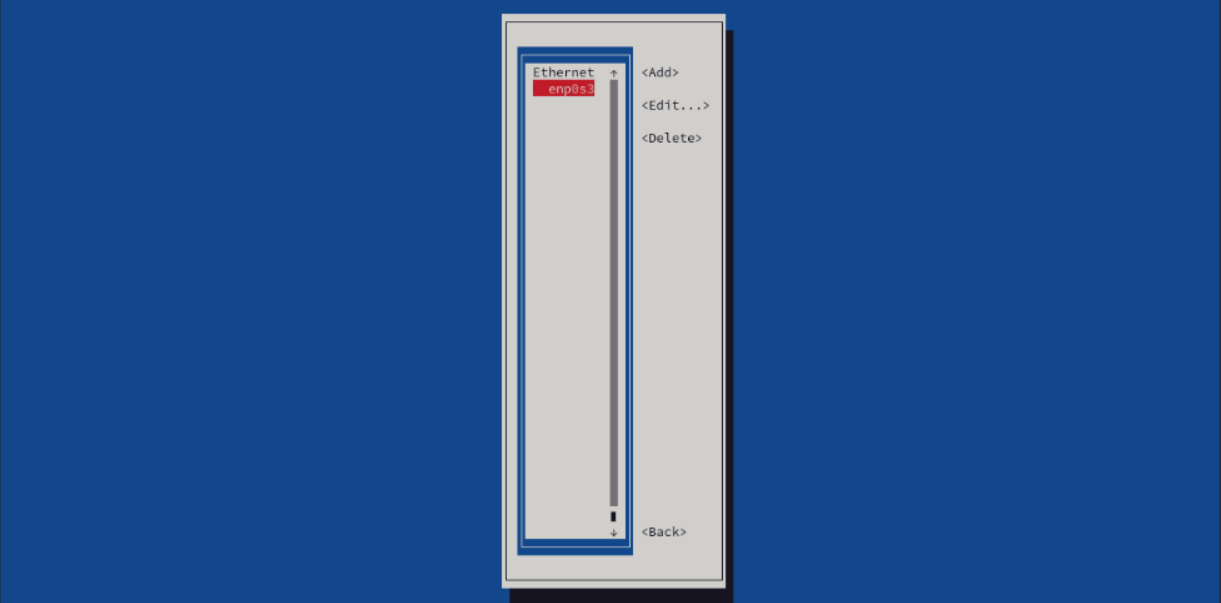
Select the relevant interface and then Edit.
Arrow down to where it says IPv4 CONFIGURATION <Automatic> and hit enter to switch it to Manual.
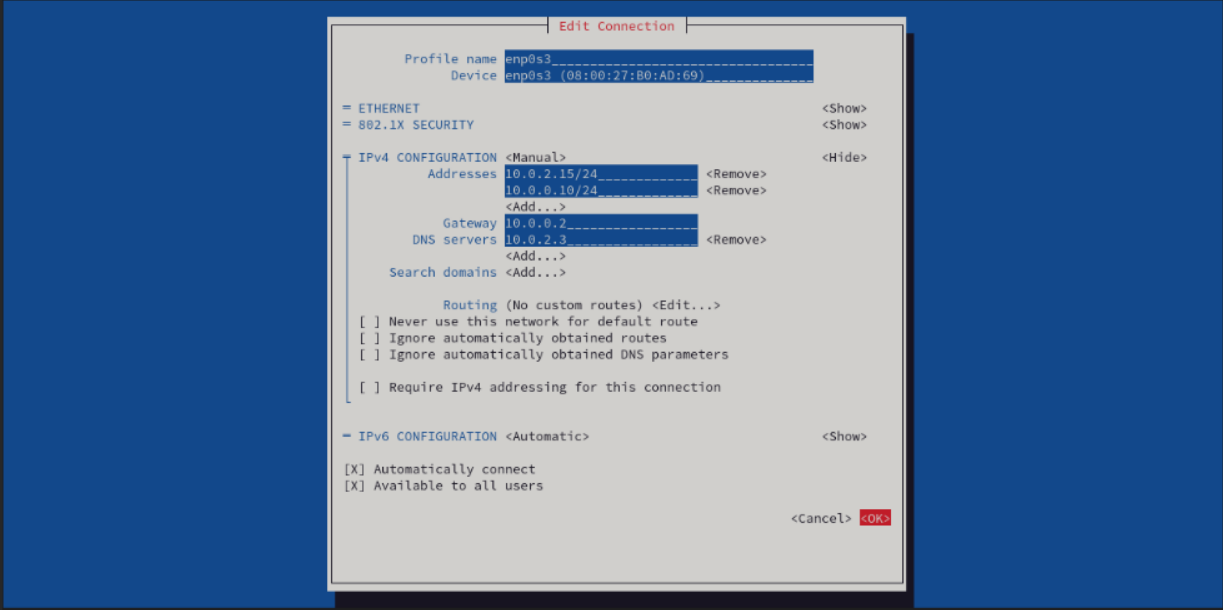
Go down to the first address and hit enter to edit. Input the address that we grabbed from the ip address command earlier.
10.0.2.15/24
3. Set a second IP address 10.0.0.10/24
#
Per the objectives, add a second for 10.0.0.10/24 just below the first one.
Next, go down to the gateway line and add the default gateway address we grabbed earlier from the ip route command.
10.0.0.2
On the DNS servers line, add the address we grabbed from /etc/resolv.conf
10.0.2.3
Finally, select OK to return to the main menu.
Select Activate a connection from the menu.
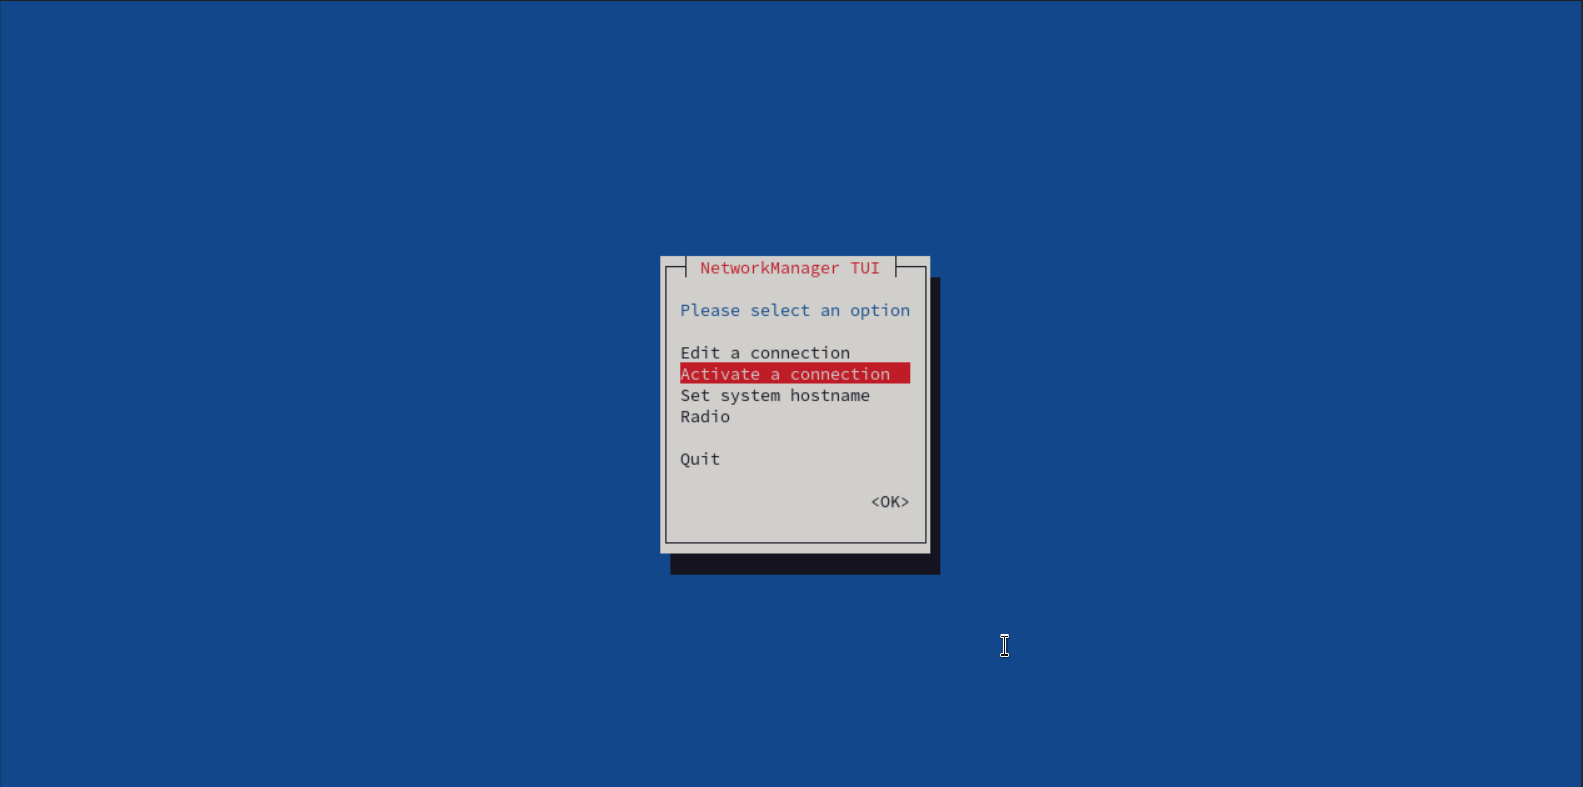
Toggle the interface off and then back on by hitting enter a few times. It should cycle through Deactivate > Activate > Deactivate

Finally, we can return to the main menu and exit nmtui
4. Enable host name resolution for your local server hostname #
Using vim
sudo vim /etc/hosts
or if you prefer nano
sudo nano /etc/hosts
add a line containing the following
10.0.2.15 rhscsa.example.com to the end of the file. Save and quit
5. Reboot and verify network is still working with new settings #
Now we should reboot to test the persistence of the new settings …
reboot
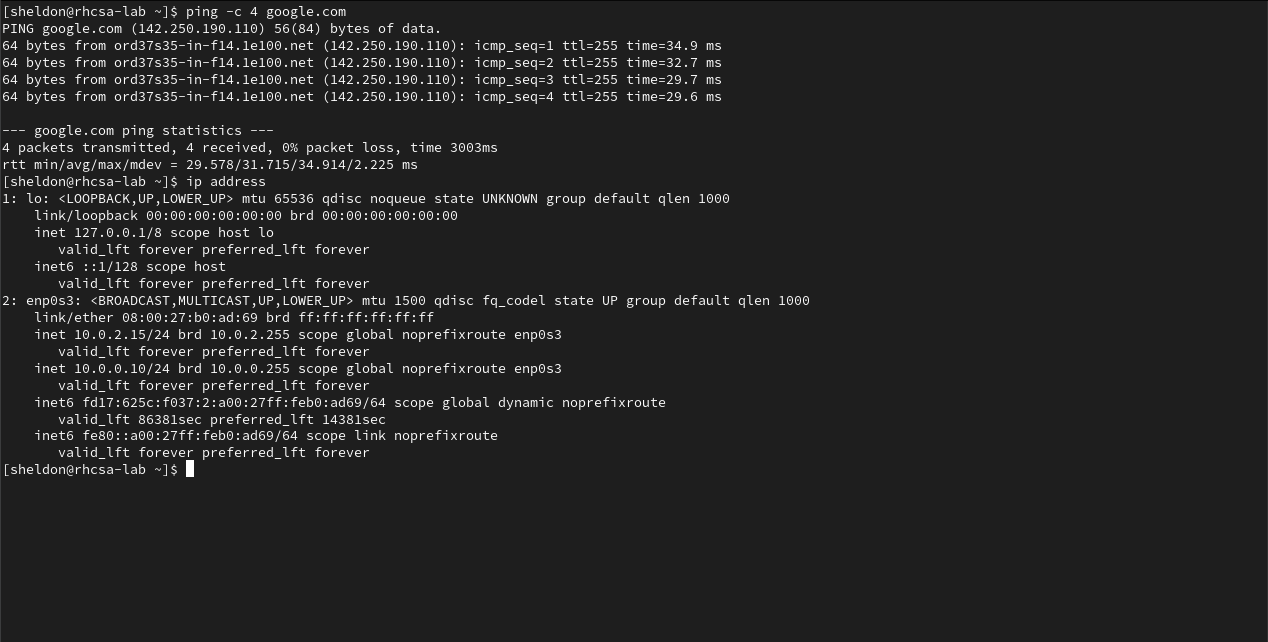
After the system reboots and we will want to run the commands below to test connectivity, DNS resolution, and configuration.
ping -c 4 google.com
ip address
If we were successful, we should see something like this.
Once you have completed all of the objectives, you’ll want to return your settings to their original configuration.
To do that, just go back into nmtui and remove the manual entries we added previously. Then switch back to automatic ipv4 configuration, toggle the connection, and reboot one last time.
reboot
Lastly, run ping and ip address to verify the settings are back to normal.

You really did it, job well done!